Exciting news! Our ConnectBooster Support documentation is moving to a new location. Be sure to bookmark the new link below.
Part 1: Creating A New BNG Gateway User
Login to your BNG Gateway portal. This can be accessed here:
https://secure.bngpaymentgateway.com/
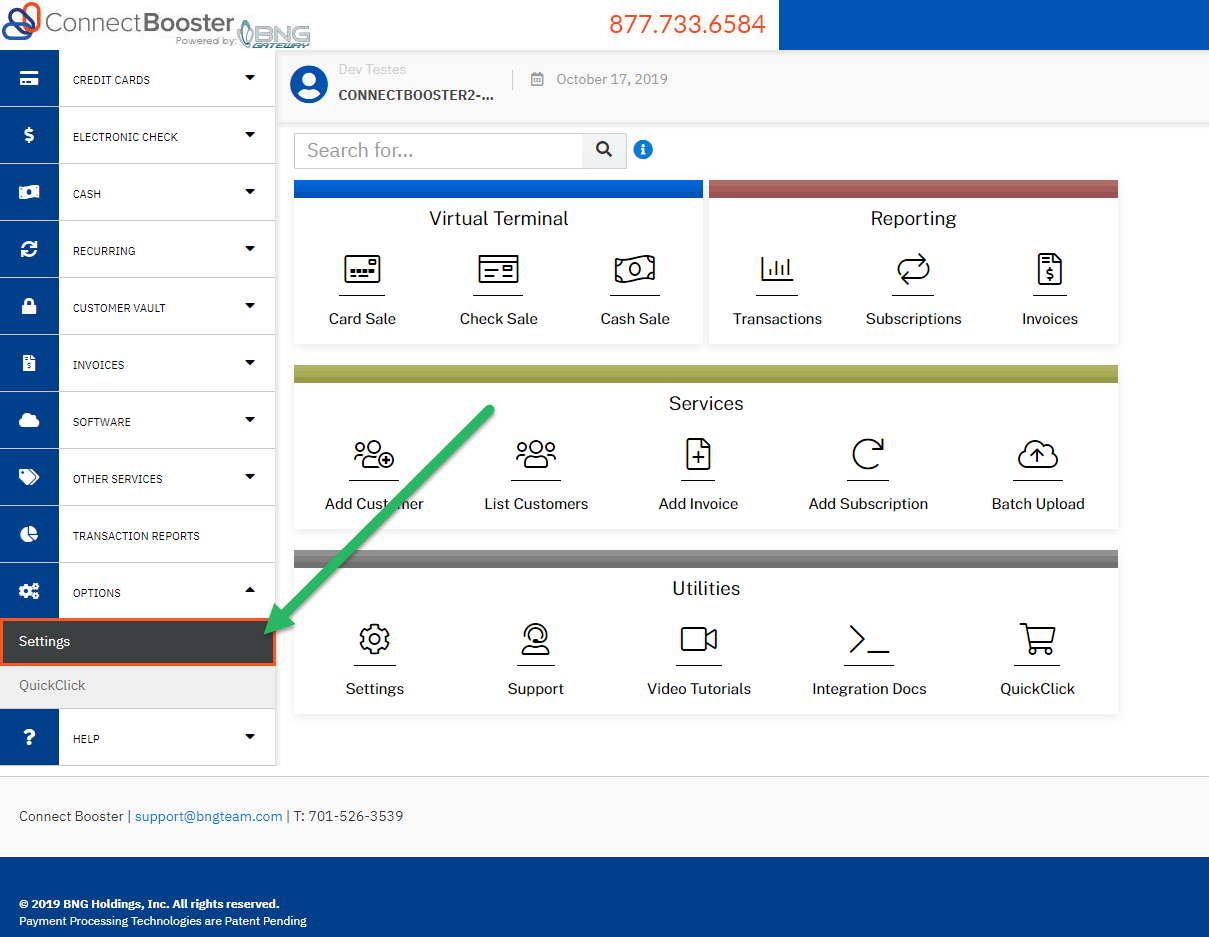
Navigate to Options --> Settings

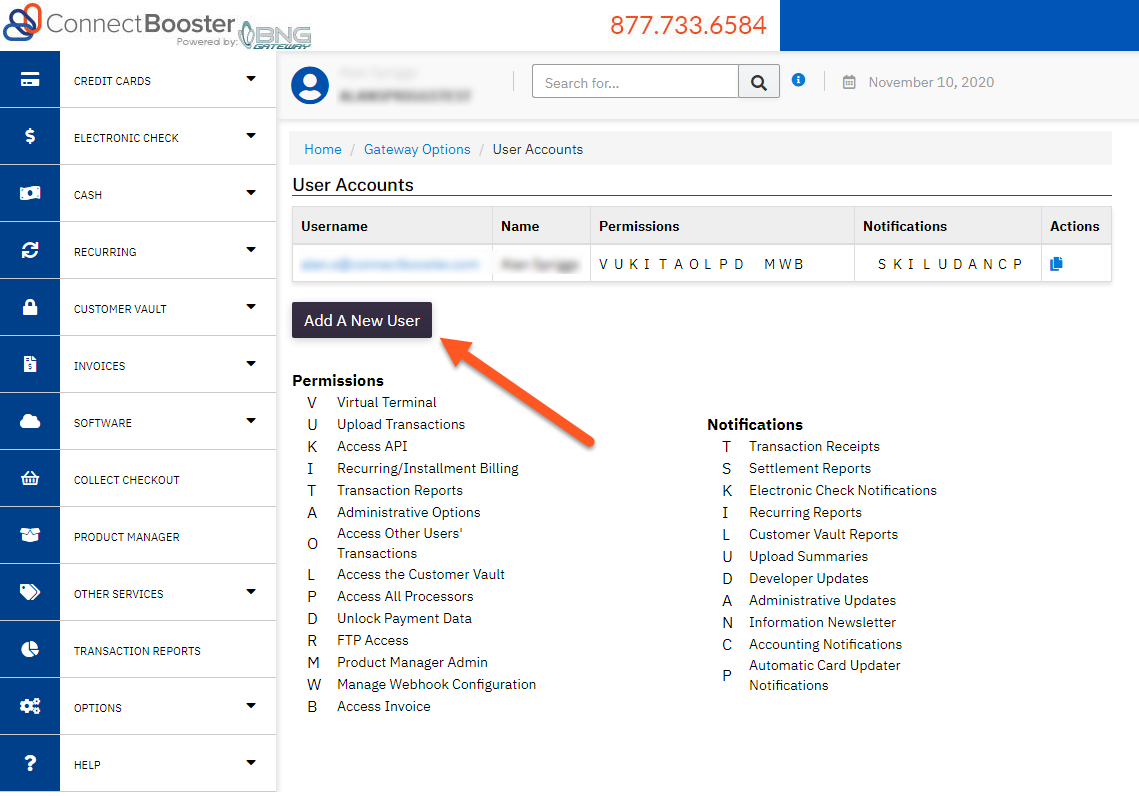
Under General Options --> User Accounts

Select the button to "Add A New User"

Complete the required fields to generate the account.
The BNG Gateway system can deliver payment notifications done by this account. Use an email address that makes sense with your workflow. Example, accounting@mspxyz.com.


Set User Permissions as Shown.
Be sure "Access Other Users' Transactions" permission is UN-checked. Forgetting this step can cause excessive payment notifications to the email address tied to this user account.

Optional: If you would like to have a copy of transaction receipts sent to the email in the user profile when a payment is triggered through the software integration, check the notification preference "Receive Transaction Receipts".
This can be extra useful if you have a workflow or need to immediately know when payments are received. This transaction receipt email will ONLY be for transactions done via this user account. Leaving the "Access Other User's Transactions" box UN-CHECKED is important, so you are not flooded with standard ConnectBooster transactions (which could get overwhelming).

Click "Create User" to finalize user setup.

Part 2: API Security Key Creation
Navigate back to Options --> Settings

Navigate to Security Options --> Security Keys

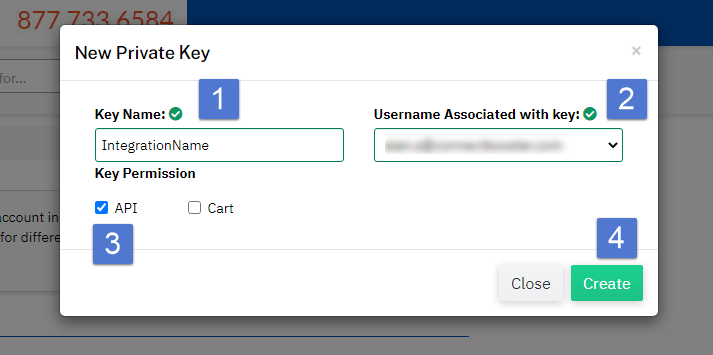
Select the "Add a New Private Key" button

1. Enter a description for the Key Name
2. Assign the User you created in Part 1 above
3. Enable the Key Permission for use with the Gateway API
4. Select the Create button to finish

Lastly, copy the newly created API Key and paste it into the software you are integrating.
