Exciting news! Our ConnectBooster Support documentation is moving to a new location. Be sure to bookmark the new link below.
+
ConnectBooster & Datto Autotask PSA Configuration Guide
Overview
Use this step-by-step guide for configuring ConnectBooster to synchronize with Autotask PSA.
Once completed, your ConnectBooster portal will then be able to pull Accounts, Contacts, Contracts, and more to help leverage AutoPay, and supercharge your Billing Automation!
The setup consists of two parts.
Part 1. The creation of dedicated credentials know as an "API User".
Part 2. Entering the credentials into your ConnectBooster Integrations section.
Preparation
To perform the integration setup, you will need:
- Admin access to Autotask
- Admin level access on your ConnectBooster "Internal User" account
PART 1
Configuring Autotask PSA
1. Creating a new, dedicated API Resource user (recommended)
"API User" resources are a special type that does not User Interface access, and does not incur additional cost.
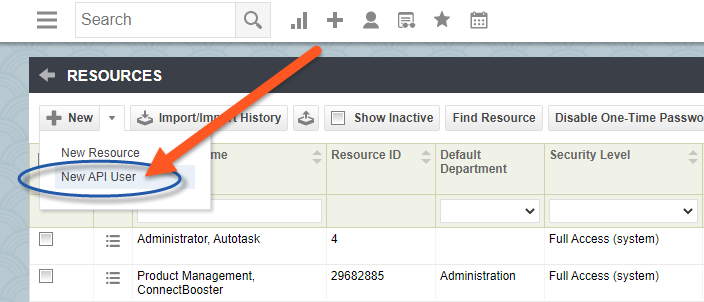
2. To generate a dedicated API User, navigate to Admin --> Account Settings & Users --> Resources/Users

Note the location of "Security Levels". It's usually recommended to create a dedicated security level for each of your vendor integrations.
API User's can have their level of access adjusted after creation, so the order of the following steps can be a matter of preference.
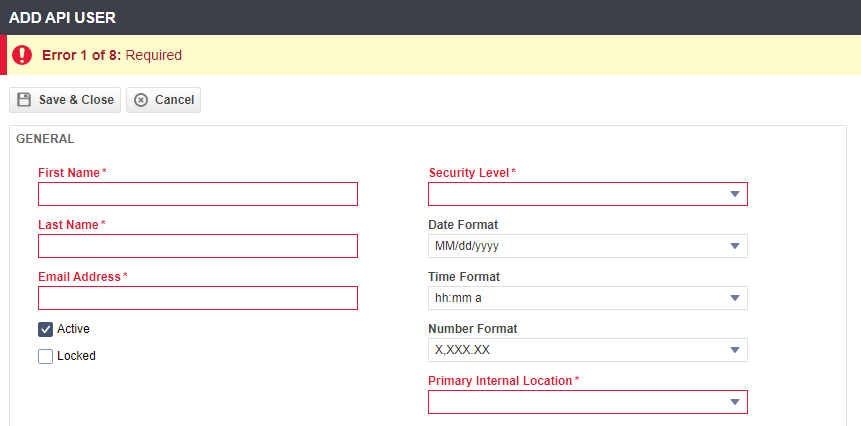
3. On the Resource creation page --> New --> API User
Fill in the required fields with your preferred values.
Note: "Security Level"
- While "API User (system)" will work, it is more access than what ConnectBooster actually needs
- To set paired down permissions, please follow the optional Custom Security Level steps outlined in the section below.
- Generate Username (Key).
- Generate Password (Secret).
- Select ConnectBooster as the Integration Vendor.
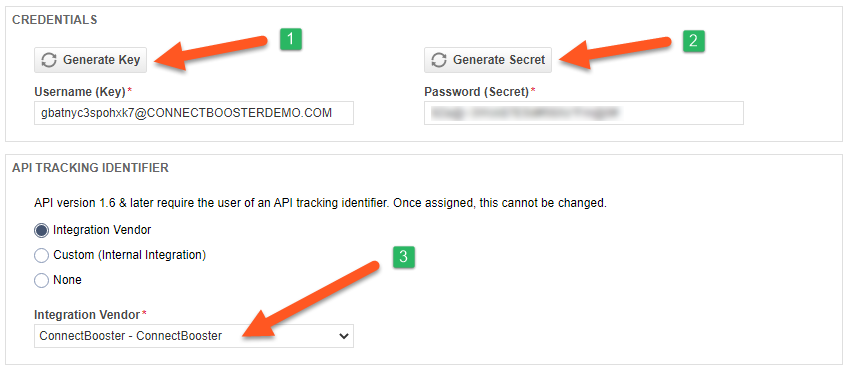
Be sure to temporarily copy these credentials.
Save to create the new User, and Proceed to Part 2 to enter these values in your ConnectBooster portal.
Creating a Custom Security Level - (OPTIONAL)
Please note: it's possible any future features/enhancements may require permission changes to a Security Level set with minimal permissions outlined below.
Navigate to Admin --> Resources/Users (HR) --> Security --> Security Levels.
As a starting point, right click on "API User (system)", and "Copy Security Level".

Set a Name

Save your changes, and assign the API User this new Security Level.

PART 2
ConnectBooster Setup
Next, within your ConnectBooster portal, navigate to Integrations.
Select the Autotask PSA integration card --> Settings
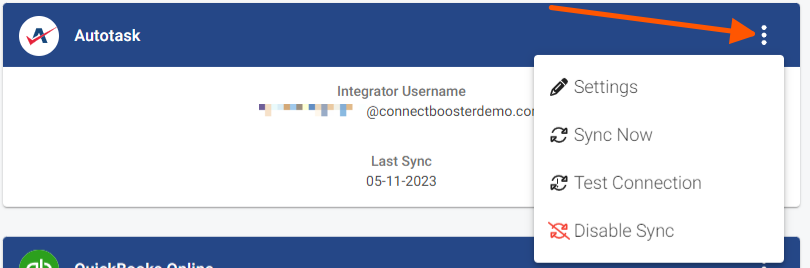
Note: if this integration does not exist for you, please contact [email protected] to have this added to your portal.
Enter the credentials:

1. The Username (Key)
2. The Password (Secret)
3. Don't Forget to Save!
Validate the credentials are correct via the "Test Connection" button.
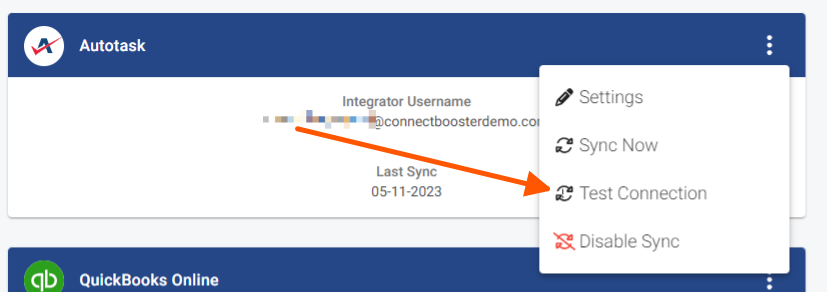
Once you see the successful confirmation, you should be all set! The connection is complete!
A sync will begin within the hour, otherwise you may immediately initialize via the "Sync Now" button.
Selecting the Invoice Image
Utilize this function to allow your clients to view/print an HTML copy of the Autotask invoice.
Invoice Image Data
Navigate to Configurations --> Billing --> Scroll to the Invoice Image Data section.
More information regarding how this, and the related functions impact your portal behavior please see this article.
If you encounter issues, please don't hesitate to Contact Support.
If the Autotask PSA integration does NOT exist, please contact ConnectBooster Support for creating NEW integrations or when CONVERTING current platforms.