Exciting news! Our ConnectBooster Support documentation is moving to a new location. Be sure to bookmark the new link below.
+

ConnectBooster & Sage Intacct Deployment Guide
Overview
Use this guide for configuring ConnectBooster to synchronize with Sage Intacct. This guide includes step-by-step instructions for connecting ConnectBooster to connect a Single-Entity Sage Intacct account, at the root level.
Preparation
To perform the sync setup, you will need:
- Full Admin access to Sage Intacct
- Admin level access on your ConnectBooster "Internal User" account
Sage Intacct Data Flow
Note: the arrows indicate the direction in which we pull/push data

Configuring Sage Intacct
Assure the Web Services subscription is active
1. Navigate to Company--> Admin--> Subscriptions

Create a Web Services Sync User with full permission, via manual or Role
2. Navigate to Company--> Admin--> Web Services Users
 3. Select "Add" to create a dedicated user for the integration

4. Fill in the required fields.
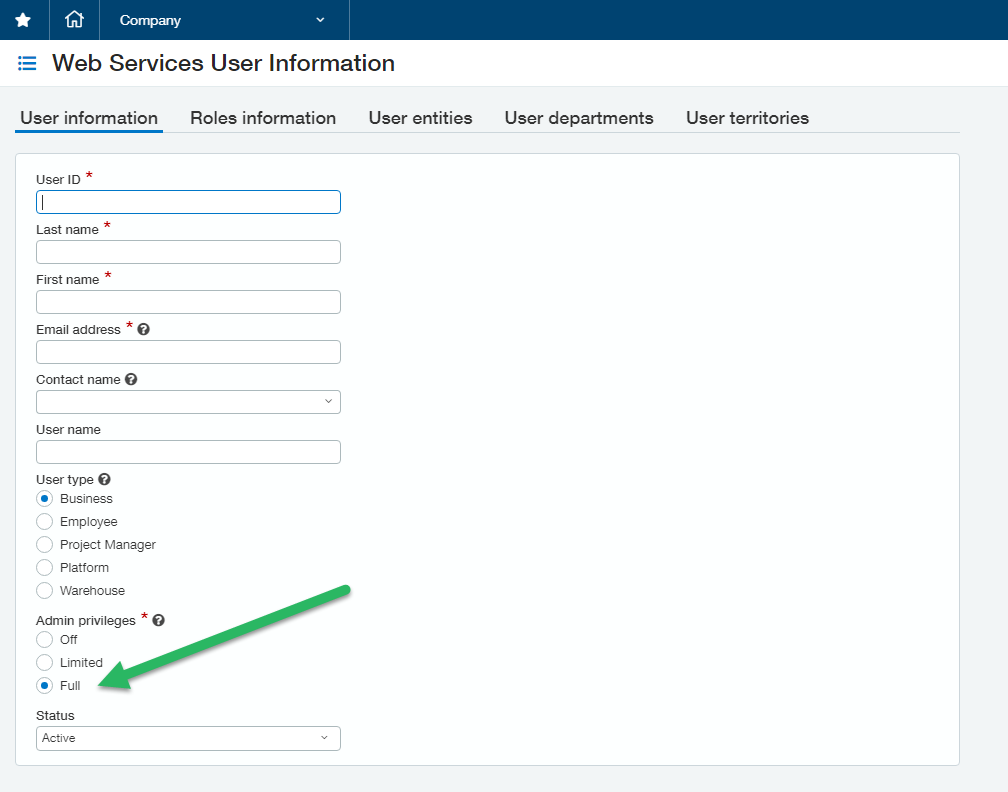
- Last name
- First name
- Email address
- User type (set to Business)
- Admin privileges (Full)
Note: This type of user is non-billable and is only used for the integration
5. Save to create the new Web Services User.
6. The email address used should receive a "Welcome to Sage Intacct!" notice
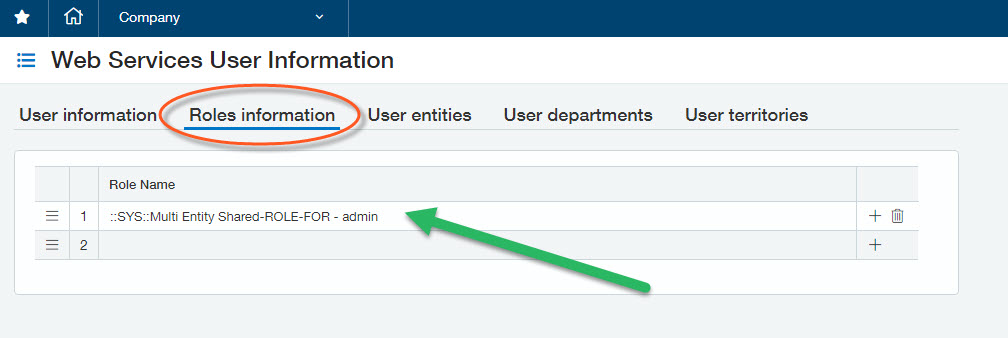
7. Define a "Role" to the new Web Services User
After user creation, navigate to "Roles information".
Assign an existing role (or create a new one), to ensure the appropriate access level.
8. Assign User Entity access
Navigate to "User entities".
Select which specific entity this Web Service user will be used to synchronize data with. If you are operating ConnectBooster at the "Top-Level", ENABLE the tick box.

9. Add ConnectBooster as a trusted SenderID for Web Services
Navigate to Company--> Company Info --> Security.
Click EDIT and Add/Enter the ConnectBooster SenderID in the web authorizations area:
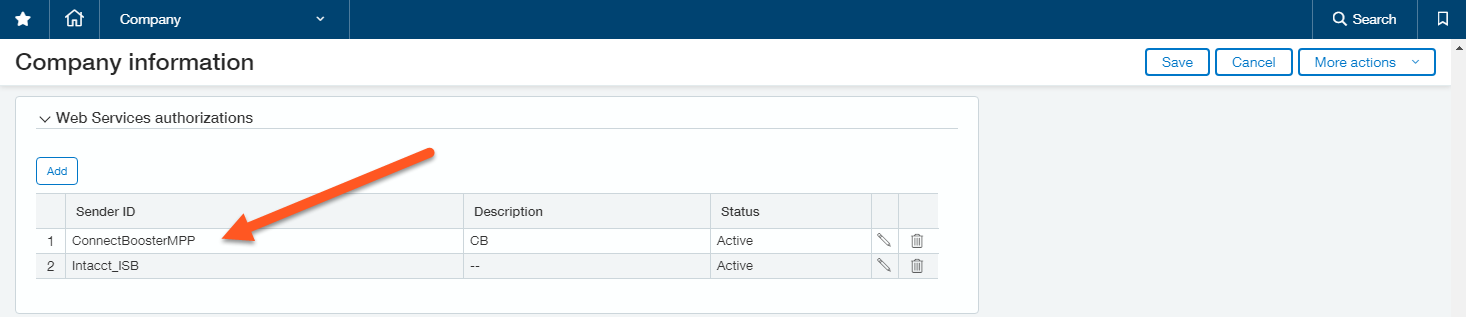
SenderID:
ConnectBoosterMPP
ConnectBooster Setup
Next, within your ConnectBooster portal, navigate to Integrations in the left-hand menu.
Select the Sage Intacct integration card
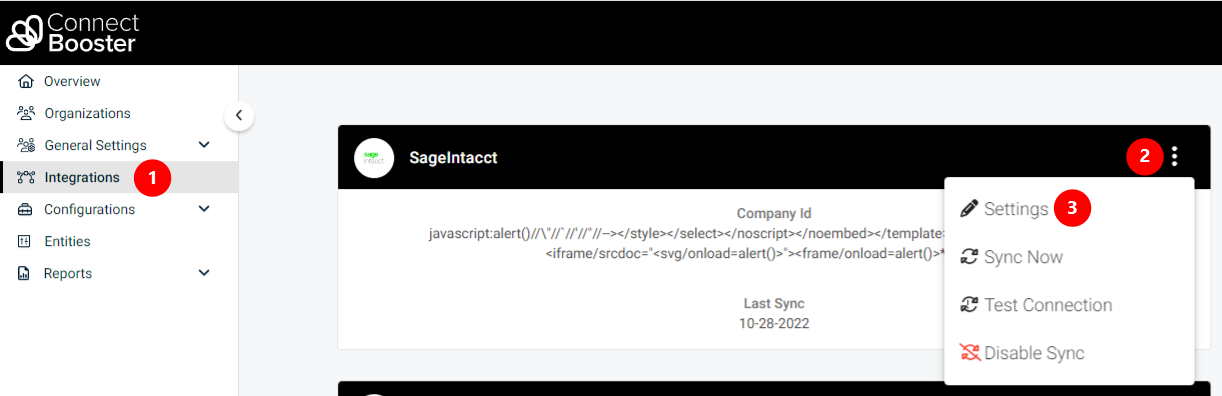
Note: if this integration does not exist for you, please contact [email protected] to have this added to your portal.
Enter in the credentials
1. CompanyID (the ID in Sage Intacct under Company Information + General)
2. User Id (WebServices Contact Name field) that was created
3. Permanent password that was set
4. Save

Next, validate the credentials via "Test Connection".
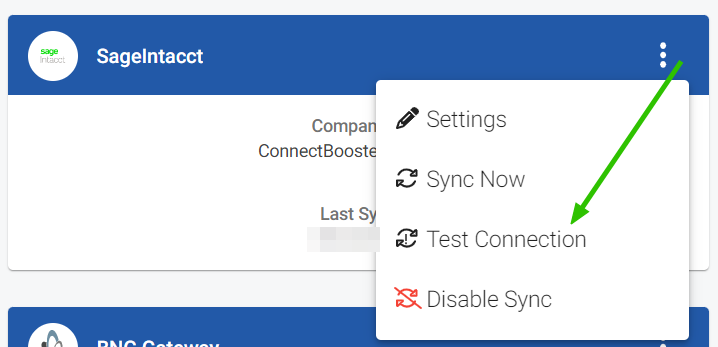
Once you see the successful confirmation toast, you should be all set! Congratulations!!
A sync will begin within the hour, otherwise you may immediately initialize via "Sync Now".
Selecting an A/R and Undeposited Funds Accounts
Any payment made within ConnectBooster will automatically apply to the invoice in Sage Intacct. A "clearing" or holdings account where the funds are sent MUST be selected.
1. Navigate to Configurations + Billing + Accounting
2. Select your GL Accounts Receivable account
3. Select your GL Undeposited Funds account, where payments will be recorded

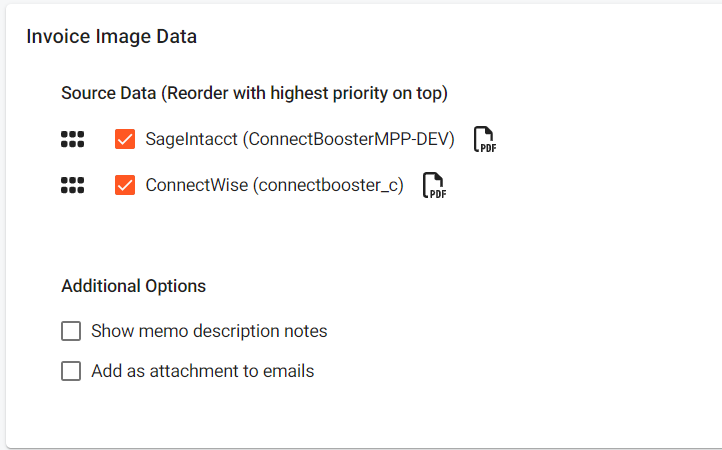
Selecting the Invoice Image
Utilize this function to allow your clients to view/print the identical Sage Intacct copy of your invoices.
Invoice Image Data
Click Configurations in the left-hand menu. Then select Billing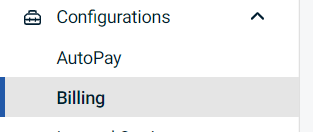
Optional: Enabling the "Adjustments Module":
If enabling the ConnectBooster payment adjustment module, an "Adjustment Entity ID" may need to be set. Please contact our support team for further assistance at [email protected].