GreatAmerica Invoice
Last Modified on 02/02/2024 12:05 pm CST
Edit Invoice
When a payment does NOT have a vendor invoice number or previous matching invoice, an invoice will need to be created or selected to apply the payment towards. Payments that have the "Edit Invoice" action means the invoice needs to be edited to supply correct information to submit the invoice to the accounting integration.
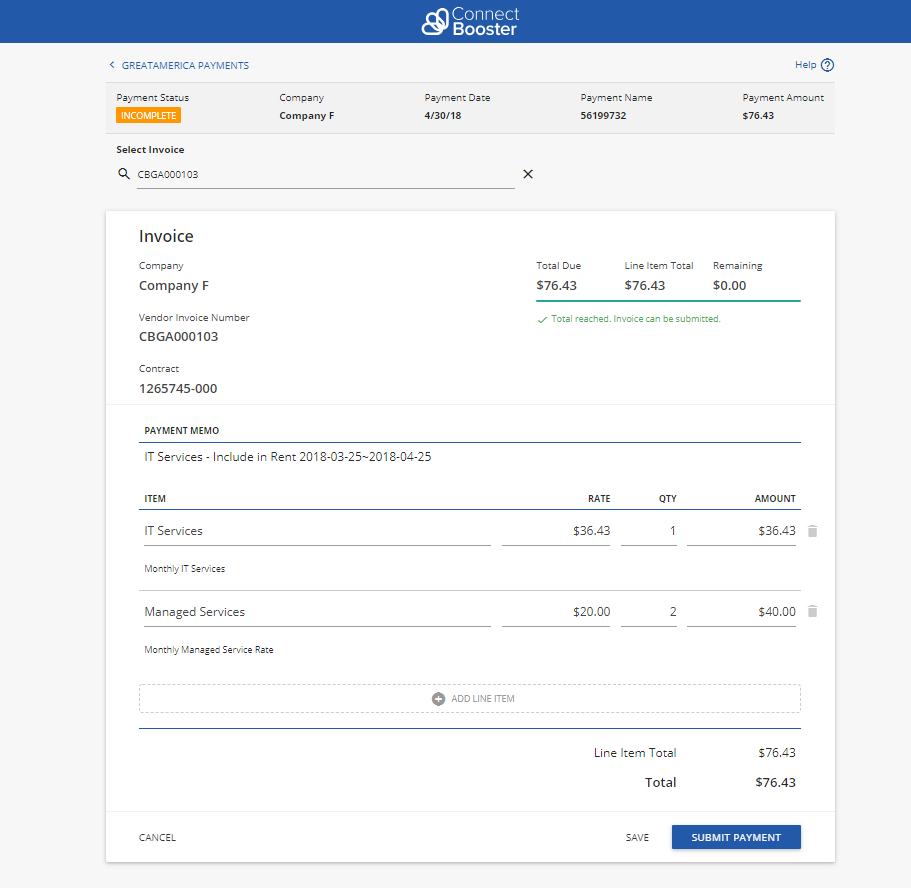
After clicking Edit Invoice next to the payment, the Edit Invoice form will be presented.
For reference, the payment information is listed above the invoice. The invoice shows the company name, Vendor Invoice Number (optional) and Contract ID (optional). The payment memo field contains a description of the charge supplied by the GreatAmerica remittance data. Select the + Add Line Item to enter the line item details for the invoice.
Select an Item ID from the list. Modify the item description, rate, quantity and amount as appropriate. Continue to add line items until the Line Item Total equals the Total Due. Click Save to save changes to the invoice and to keep the invoice in an Incomplete state. When the Remaining field equals 0, the invoice can be submitted by clicking the Submit Payment button.
Clicking Submit Payment will change the state of the payment to Pending Sync where it will remain until a sync is done with your accounting integration.
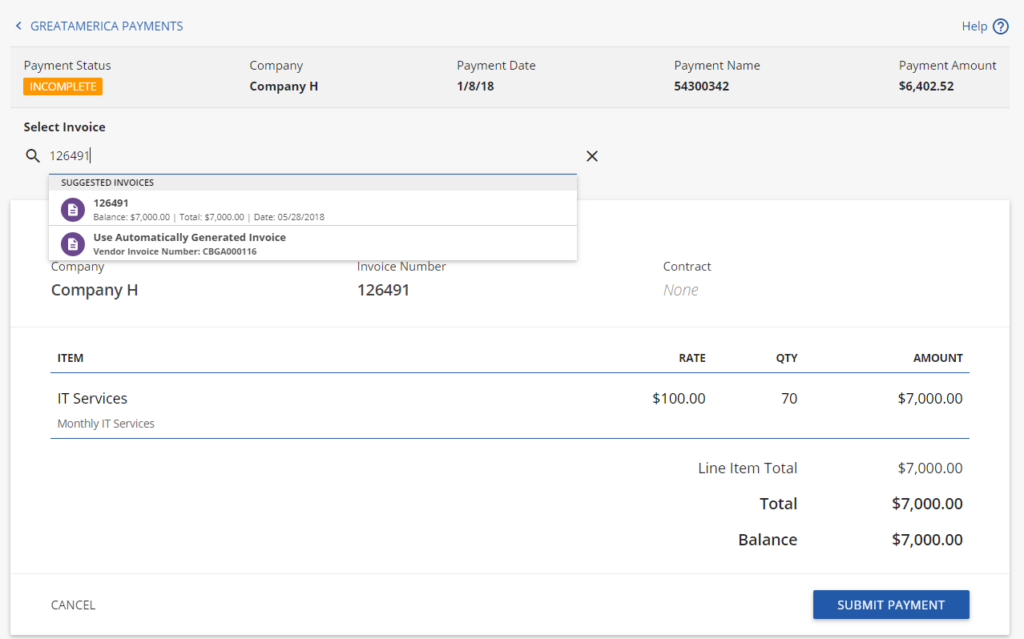
To select an invoice to apply the payment towards, enter in an invoice number in the Select Invoice field. In the drop down list, select the appropriate invoice to be used. Only open invoices that have a total equal or greater than the payment amount will be shown in the drop down list. A selected invoice can not be modified or have additional line items added.
If you no longer want to select an existing invoice but rather use the invoice generation provided by ConnectBooster, select the invoice named Use Automatically Generated Invoice. Clicking Submit Payment will change the state of the payment to Pending Sync where it will remain until a sync is done with your accounting integration.