Exciting news! Our ConnectBooster Support documentation is moving to a new location. Be sure to bookmark the new link below.

Zomentum Setup
This document is broken down into 4 parts, which should take less than 10 minutes.
Once complete, you will be able to utilize Zomentum with the same BNG Gateway/ConnectBooster back-end you are already using today.
One of the major benefits to this allows your clients to pay directly from their Document acceptance page!
Note: To accept both Credit Cards and ACH, the integration method must include both a "Private" and "Public" Security Key (setup steps in this document). Previously connected integrations with Zomentum were configured as Credit Card only.
Part 1: Creating A New BNG Gateway User
While creating a new BNG Gateway User is not 100% required, we highly recommend doing so. Creating a dedicated BNG Gateway user account for any new integration gives greater flexibility with reconciliation reports, and email notifications. This step is covered below.
Part 2: Creating a Private Security Key.
To start Part 1 & 2, visit and finish this supporting article before proceeding to Part 3.
Part 3: Tokenization Public Security Key
The next step is very similar to what was done previously, with the notable distinction of creating a "Public" Key, rather than private.
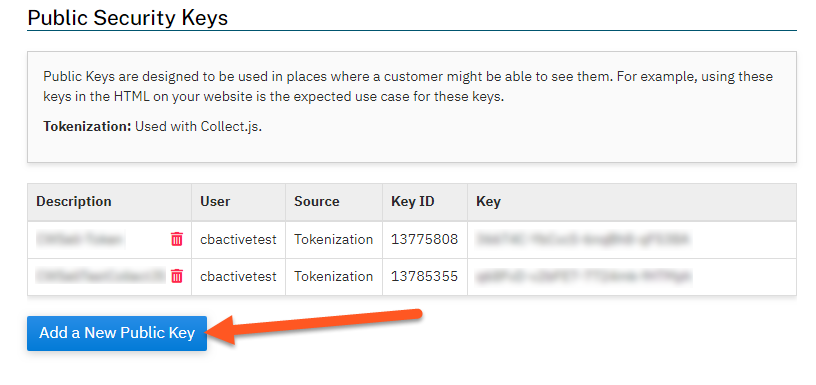
Inside the BNG Gateway, navigate to the Options + Settings+ Security Keys, and scroll down to the "Public Security Keys" section.
Select "Add a New Public Key"
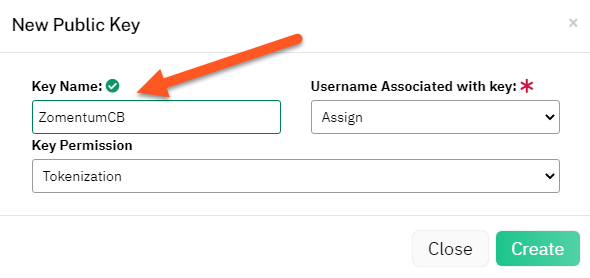
1. Enter any Key Name (Example "ZomentumCB")
2. Select the user previously created in Part 1.
3. Tokenization needs to be selected on the drop-down.
4. Complete key creation using the button
Part 4: Zomentum Configuration Steps
Navigate to Settings + Integrations.

Scroll down the list to Payment Gateways, and select Connect for "ConnectBooster".

Paste in the "Private" & "Public" Keys from Part 2/3.

Select "Connect" to commit the changes.
You should see success message confirming the integration has been completed.

Additional Options
Please reference Zomentum's support article for additional configuration. You can find their article regarding the setup here:
Take note of the "Default Payment" option, under the Preferences section.
This can be found under Settings + My Preferences.

On an individual document, take note of the "Payments" option, which dictates what amount your client will be able to pay, or if payment is optional.

If you are having difficulty with the integration, we suggest to first contact Zomentum support at [email protected]
Client Facing side:
From the client's perspective, selecting "Pay and Approve" displays the payment method selection screen.

Credit Card:

ACH:

Note: transactions made will need to be manually received within your accounting system. This process does not change today.
Workflow Diagram:
