Exciting news! Our ConnectBooster Support documentation is moving to a new location. Be sure to bookmark the new link below.
+
ConnectBooster & Kaseya BMS Configuration Guide
Overview
Use this step-by-step guide for configuring ConnectBooster to synchronize with BMS.
Once completed, your ConnectBooster portal will then be able to pull Accounts, Contacts, Contracts, and more to help leverage AutoPay, and supercharge your Billing Automation!
The setup consists of two parts.
Part 1. The use of existing BMS credentials, or configuration of a dedicated "API Employee" (recommended).
Part 2. Entering the credentials into your ConnectBooster Integrations section.
Preparation
To perform the integration setup, you will need:
- Admin access to Kaseya BMS
- Admin level access on your ConnectBooster "Internal User" account
PART 1
Configuring BMS
1. Take note of your BMS Company Name. This value will be used during the setup portion inside your ConnectBooster portal.
Your Company Name should be the same value used on the BMS Login page.

Creating a dedicated API Employee (recommended)
The User Type of "API Employee" is a special type that does not have access to the User Interface of BMS (more information on this can be found here).
2. To generate a dedicated API Employee, navigate to Admin --> HR--> Employees --> New
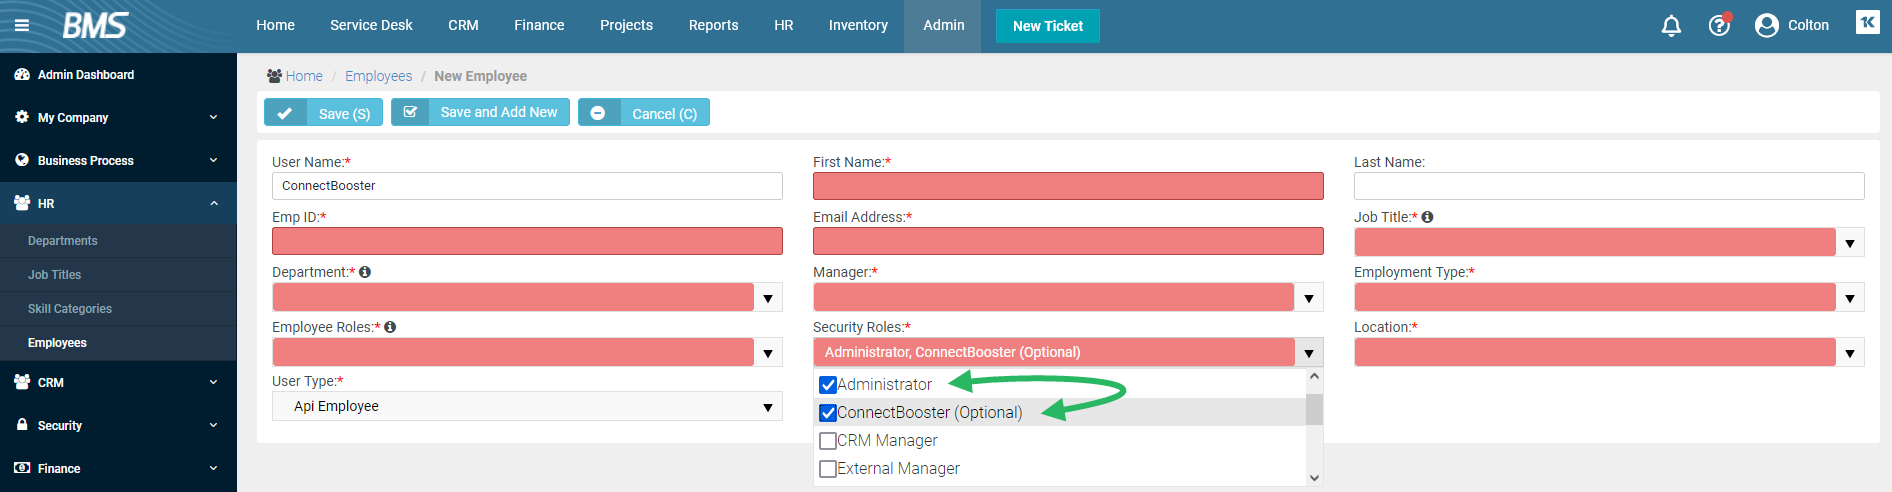
3. On the New Employee creation page, fill in the series of required fields denoted by asterisks/red boxes with the values of your choosing.
The three notable fields to pay attention to:
- User Type (Set to API Employee)
- Email Address (Set to an inbox you can retrieve the emailed password, as this User Type can not manually set a password)
- Security Role (Note: While a role like "Administrator" will work, it is more access than what ConnectBooster actually needs)
- To set paired down permissions, please follow the optional steps outlined in the next section below
4. Save to create the new User.
5. Use the Reset and Email Password button.
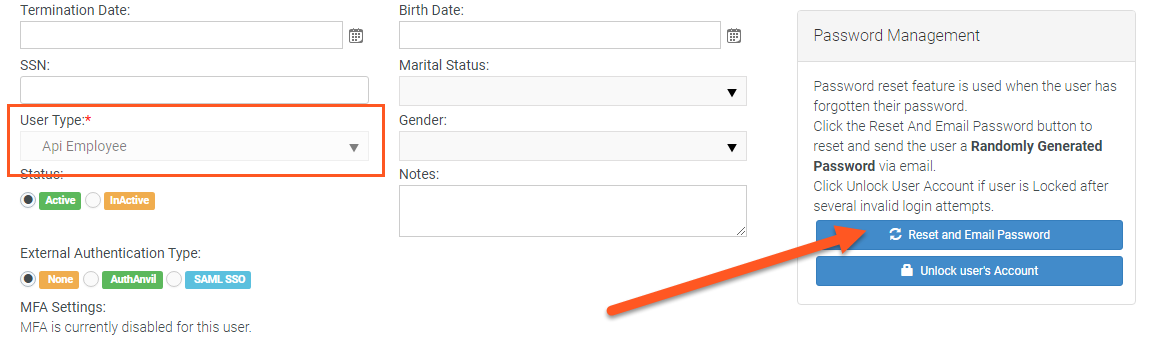
6. The email address used should receive the credentials.
Proceed to Part 2.
Creating a dedicated Security Role - (OPTIONAL)
Please note: it's possible any future features/enhancements may require permission changes to a Role set with bare minimum permissions outlined below.
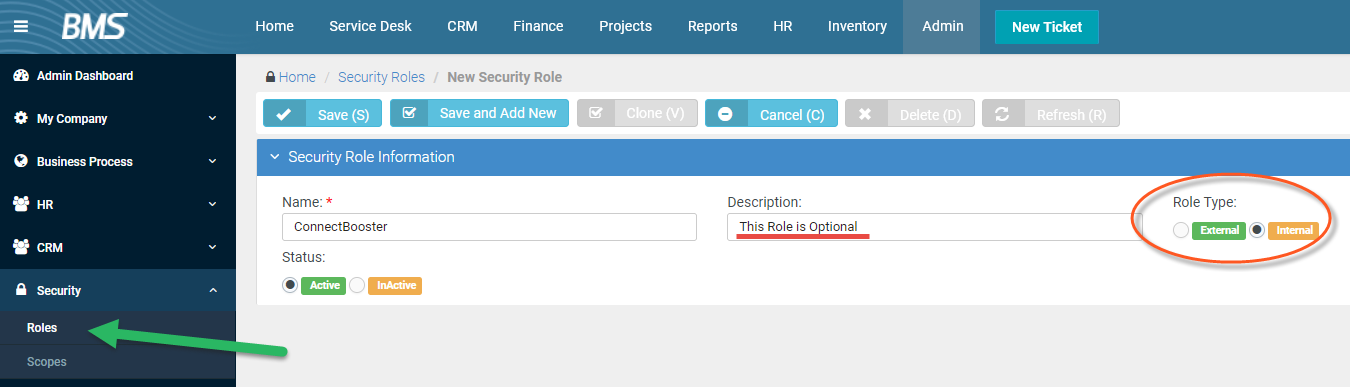
Navigate to Admin --> Security --> Roles. Create "New".

Note: The User Type "API Employee" can NOT have a Security Role Type set to "External"
Role Permissions:
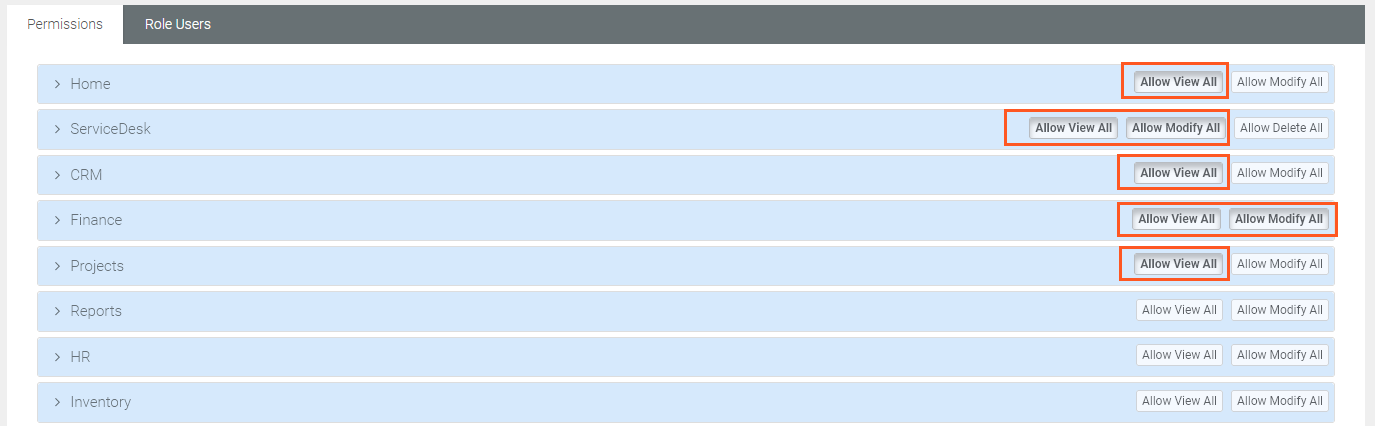
Important "Special Features" option:
Be sure to set "Has API Access", under the Admin permissions accordion.
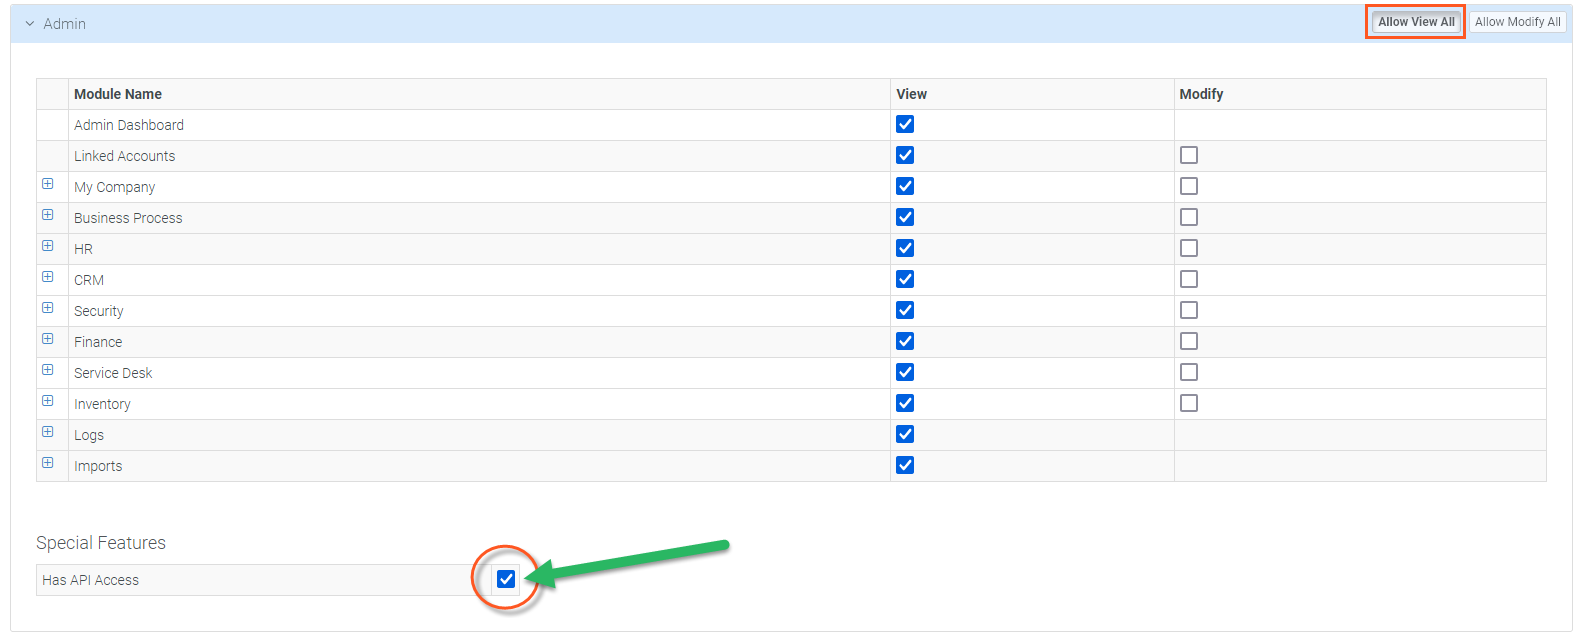
Save your changes, and proceed to assign the API Employee this new Security Role.
PART 2
ConnectBooster Setup
Next, within your ConnectBooster portal, navigate to Settings --> Configuration --> Integrations.
Select the Kaseya integration card --> Settings


Note: if this integration does not exist for you, please contact [email protected] to have this added to your portal.
Enter the credentials:

1. Your Company Name (on the BMS Login Page)
2. Username (User with admin credentials, or a dedicated API Employee)
3. Password
4. Default BMS Server endpoint (bms.kaseya.com)
Don't Forget to Save!
Next, validate the credentials via the "Test Connection" button.

Once you see the successful confirmation toast, you should be all set! The connection is complete!
A sync will begin within the hour, otherwise you may immediately initialize via the "Sync Now" button.
Selecting the Invoice Image
Utilize this function to allow your clients to view/print the identical invoice template from BMS.
Invoice Image Data
Navigate to Configurations --> Billing --> Scroll to the Invoice Image Data section.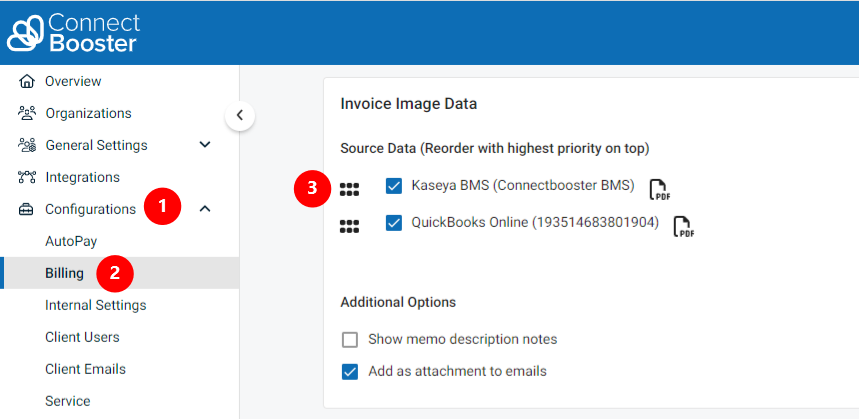
More information regarding how this, and the related functions impact your portal behavior please see this article.
If you encounter issues, please don't hesitate to Contact Support.
If the Kaseya BMS integration does NOT exist, please contact ConnectBooster Support for creating NEW integrations or when CONVERTING current platforms.