Exciting news! Our ConnectBooster Support documentation is moving to a new location. Be sure to bookmark the new link below.
ConnectBooster & Dynamics GP Deployment Guide V2.0
Overview
Use this guide to learn how to install and configure ConnectBooster for use with Microsoft Dynamics GP. This guide includes step-by-step instructions for installing the ConnectBooster REST API for GP and setting up Dynamics GP for use with ConnectBooster.
For more information or assistance, please visit the ConnectBooster website at http://www.connectbooster.com.
Configuring Security
The ConnectBooster GP REST API uses direct SQL access, simplifying security and permissions.
Create a SQL database user and configure the following SQL permissions for the SQL user that will be used for the integration.
Note: The user created must be a SQL database user and not a domain account. A domain account that is provided SQL permissions will not be able to authenticate properly to support the needs of the API.
| Database | Role Needed |
|---|---|
| DYNAMICS | DYNGRP |
| Company DB | DYNGRP |
ConnectBooster GP REST API Installation
The ConnectBooster GP REST API provides a modern REST-based API. Download the ZIP folder below, and continue with the installation steps.
DOWNLOAD:
Prerequisites
The ConnectBooster GP REST API requires:
- Windows Server 2012+
- IIS 7+
- IIS Management Service Enabled
- ASP.NET 4.5+ Installed
- .NET Framework 4.5.2+
- Web Deployment Tool for IIS
- Fully trusted SSL certificate from a trusted certificate authority for the URL you plan to use for the API
- DNS Entry binding the Public IP address for your IIS Host machine and SSL enabled port or your choosing, to your intended API site URL. Example: https://gpapi.yourdomain.com
Prerequisite Installation
To install the “Management Service” role:
Click Server Manager in the Start menu, select the Roles node in the left-hand tree view, and scan down to find the Web Server (IIS) role. Click Add Role Services and select the Management Service component.

To install ASP.NET:
- On the Start page, click the Server Manager tile, and then click OK.
- In Server Manager, select Dashboard, and click Add roles and features.
- In the Add Roles and Features Wizard, on the Before you begin page, click Next.
- On the Select installation type page, select Role-based or feature-based installation, and click Next.
- On the Select destination server page, select Select a server from the server pool, select your server, and click Next.
- On the Select server roles page, select Web Server (IIS), and click Next.
- On the Select features page, click Next.
- On the Web Server Role (IIS) page, click Next.
- On the Select role services page, note the preselected role services that are installed by default, expand the Application Development node, and then select ASP.NET 4.5. (If you installed .NET 3.5, select ASP.NET 3.5 also.)
- On the Summary of Features to Install page, confirm your selections, and then click Install.
- In the Add features that are required for ASP.NET 4.5? box, click Add Features. The following additional features are added:
- .NET Extensibility 4.5
- ISAPI Extensions
- ISAPI Filters
- .NET Extensibility 3.5 (If ASP.NET 3.5 was selected)
- Click Next.
- On the Confirm installation selections page, click Install.
- On the Installation progress page, confirm that your installation of the Web Server (IIS) role and required role services completed successfully, and then click Close.
To install the Web Deployment Tool:
See Installing the Web Deployment Tool.
Installation
On your server that you will be installing the GP REST API perform the following steps:
- Always make a backup prior to changing your system. Run the following command to backup an IIS 7.0 or above server:
- %windir%\system32\inetsrv\appcmd add backup "PreMsDeploy"
- Open the IIS Manager by clicking Start > Run and typing inetmgr.
- In IIS Manager, expand the Server node and the Sites node. Right-click the Sites note and choose “Add Website”.
- In the “Site Name” field, type “CB GP Rest API”. Take note of the Application Pool name, as you will need this for a future step.
- For the “Physical Path”, click the … icon and create a new folder on your server for the REST API to be installed to. Example: C:\inetpub\CB GP REST API
- Under binding, choose https, select the local IP address that you would like to bind to, and select the port you will use.
- Select the fully trusted SSL certificate from the dropdown that you plan to use.
- Click the checkbox to “Start Website Immediately” and click “Ok”.
- Right-click on the new website that was created In the right-hand Actions pane, click the Import Application... link to launch the packaging wizard.
- Select the package that you downloaded in step 2.
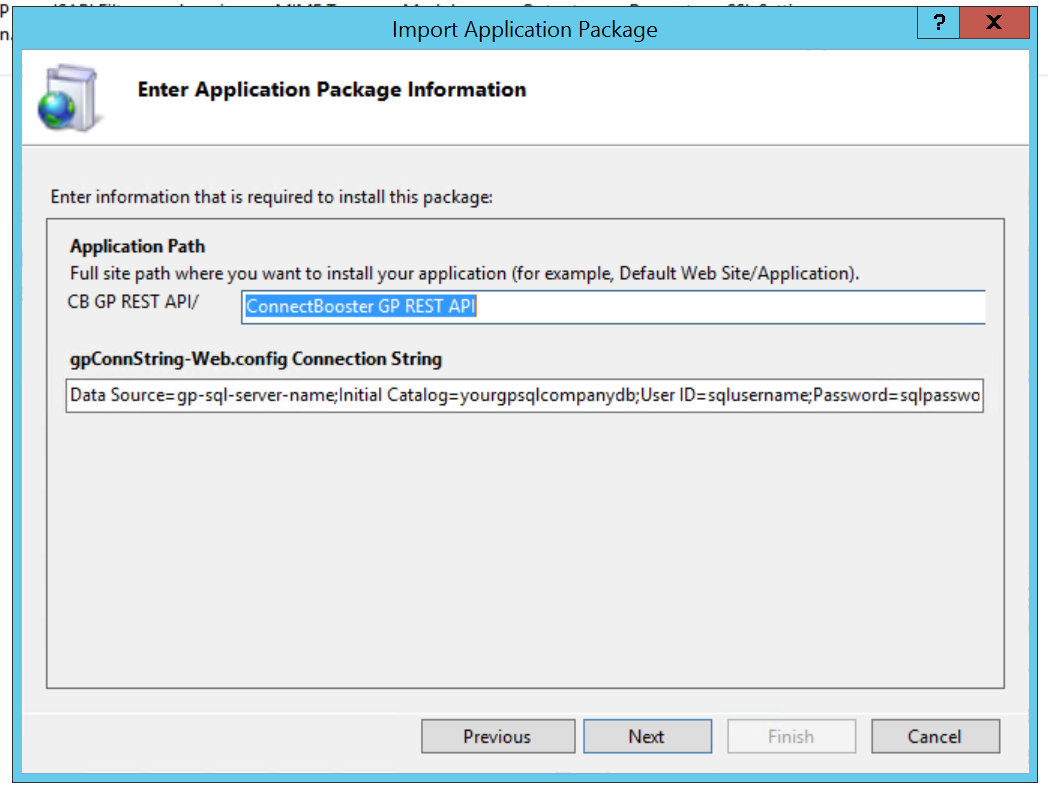
- In the Install an Application Package dialog, you will see the application and the database.
- On the Parameters page, simply click “Next”. We will set other parameters in a future step.
- Click Next to install the package.
- The Summary page will provide a high-level overview of some items that were installed from the package. The Details tab will give a lot of detail of exactly what was added.
- In File Explorer, navigate to the “Physical Path” folder you created in step 5. Double click into the REST API folder (default value is /ConnectBooster GP REST API). Ensure that the IIS Application Pool account, ASPNET account, and Network Services account has read/write permissions to the web.config file located in this folder.

Configuring API Settings
Upon completion of the API installation, several settings must be configured. To configure these settings, open IIS Manager.
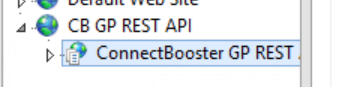
- Expand the server node and the Sites node. Expand the website you created and click on the “ConnectBooster GP REST API” virtual directory.
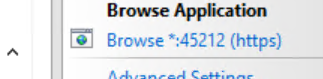
- In the right menu, choose the Browse option.
- Fill in the settings on the settings page and save.

- Generate new API keys. You will need these to configure the integration in the ConnectBooster portal.


Security Note: Firewall Configuration.
If you wish to restrict access to the IIS hosted endpoint, by limiting the traffic to which your chosen site URL will respond, you may contact the ConnectBooster support team to request a list of the IP addresses currently in use by our primary, backup, and redundant servers.
Configuring GP Credit Cards
ConnectBooster requires at least one credit card payment type to be configured. To configure your credit card payments types, follow these steps:
1. Navigate to Tools --> Setup --> Company --> Credit Cards.
2. Create a Credit Card record for each supported card type, based on the following table:
Card/Transaction Type | Accepted Card Names |
|---|---|
| Visa | Visa, VC, VS |
| MasterCard | MasterCard, MC, Master Card |
| Discover | Discover, DISC, DS |
| American Express | AmericanExpress, American Express, AMEX, American Ex, AM EX, AX |
| E-Check/ACH | ACH, E-check, Echeck, E check, E-cheque, Echeque, E cheque, EFT |
Ensure you have used one of the “Accepted Card Names” from the table above for the Card Name field. Check the “Accepted from Customers” box. Choose Bank Card and the appropriate Checkbook ID. Save a new record for each card type that is supported and for E-Check if appropriate.

Configuration within ConnectBooster
Navigate to Integrations. Select your Microsoft GP integration card.

Fill in the API Key, API Secret and Endpoint URL. Select Save, and then "Test Connection".
Once you see the successful confirmation toast, you should be all set! Congratulations!!
A sync will begin within the hour, otherwise you may immediately initialize via "Sync Now".
Configuring the Optional SSRS Connector
Utilize this function to allow your clients to view/print the identical copies of your invoices.
Browse Website
Click on the new website under Sites and choose to Browse. Note – you may see a certificate error if running locally – this is expected and you can continue to the site.
Configure Settings
Enter in the appropriate values in the configuration form and click Save Settings.
Test and Approve the Confirmation
You can enter a valid invoice number and click the Test button to ensure your connection to SSRS.Configuring ConnectBooster
Add Custom Integration
Open your ConnectBooster portal and click on Settings + Integrations. Add a new integration with a type “Custom” or please contact ConnectBooster support to have us do it for you.
Name Integration
Open your new integration and give it a name of SSRS Connector.
Fill in Integration Settings
Click the GetInvoiceImage button and fill in the integration settings.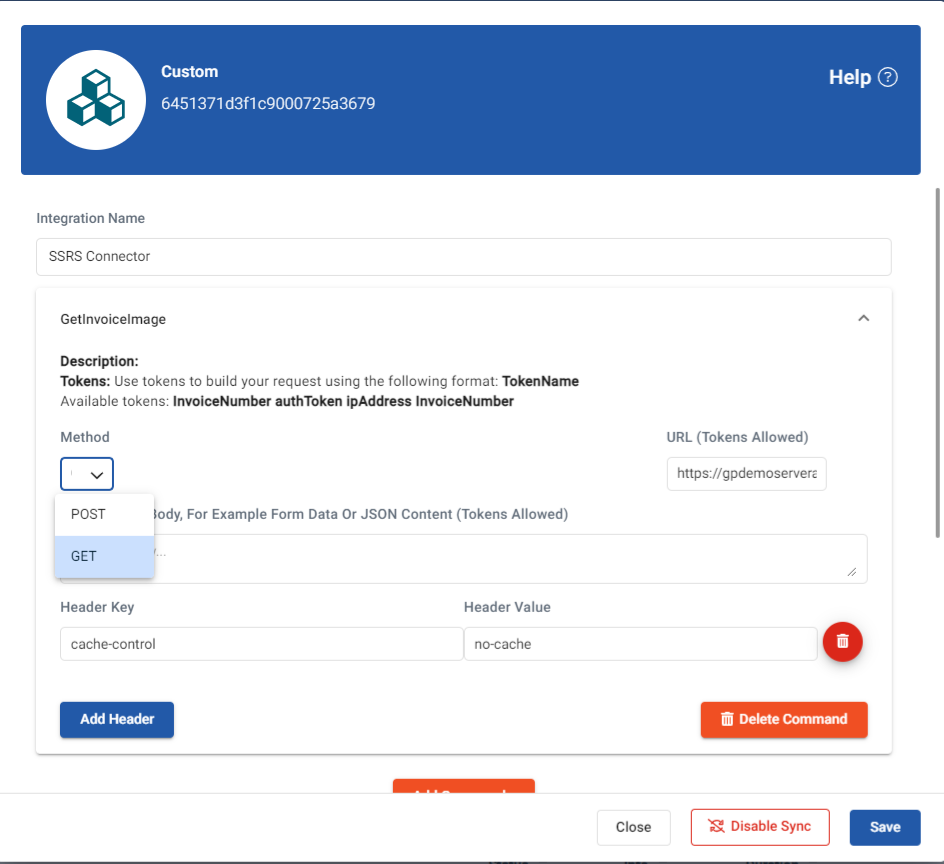 Use a GET method, and enter your URL for the SSRS Connector you set up earler. The full URL would be https://yoururl/reports/Invoice/
Add Header
Click the Add Header button. with the Header Key named authorization. Paste the Base64 encoded key value you copied in the steps above. Then, click the Save button.
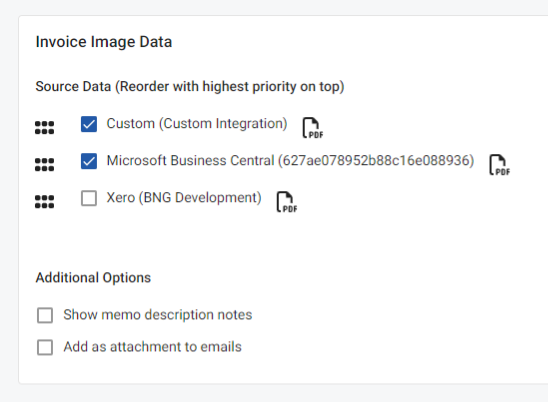
Invoice Image Data
Click on Configurations in the top menu. Then click on Billing in the left menu.
If you encounter issues, please don't hesitate to Contact Support.