Setting up the ConnectWise Manage integration

Exciting news! Our ConnectBooster Support documentation is moving to a new location. Be sure to bookmark the new link below.

https://help.cb.kaseya.com/help/Content/0-HOME/Home.htm

Creating an API Member

These steps are required to get ConnectBooster syncing data from ConnectWise Manage.

 Note: Your ConnectWise Manage admin or another team member with elevated permissions may be needed to access some of the areas described below. 
Login to your ConnectBooster portal’s administration area. Navigate to Settings --> Integrations. ConnectWise Manage should be already be listed as your integration. If not, please contact support.

Next login into ConnectWise Manage with credentials for a user which has access to the "Member Management" section.

Navigate to System --> Members, and select the API Members tab at the top. 
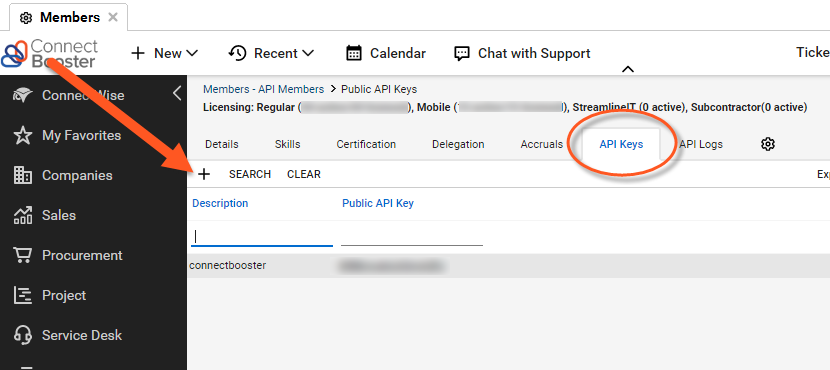
Note: If you do not see an API members tab, you may need to click the Gear icon and move it to the displayed tabs list 

API Members are a special class of ConnectWise member and do not occupy a ConnectWise license. Use the plus sign (+) to add a new API Member. 

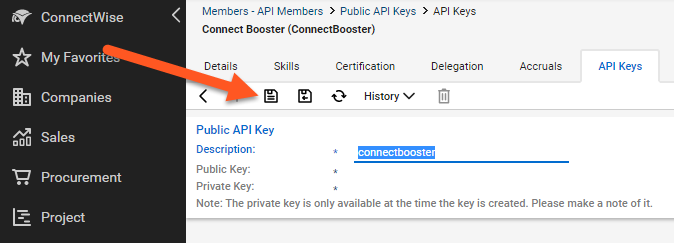
  1. On the new member creation page, you may name it whatever you choose, or simply set the Member ID to “ConnectBooster.”
  2. You will note a series of required fields denoted by asterisks.  Fill out each of required fields under both the Profile and System areas with values of your choosing.
  3. Under Security Information, set the "Role ID" to Admin or a similarly high-level role and make a selection for both Level & Name as well.
  4. Click Save


Note: if you prefer to setup a custom Security Role with fewer permissions, please see the article Less Than Admin


Continue to make selections for the required entries in the System Defaults, Time/Expense/Billing Information, and Sales Information, bearing in mind this API Member will need to access information for all the organizations listed in your ConnectBooster portal. 

With the required fields completed, save the new API Member profile. Next, select the API Keys tab above and to the right of the options to save. (Note: Again, if you do not see an API Keys tab, you may need to click the Gear icon and move it to the displayed tabs list)

Use the plus sign (+) to add a new API Key. For the key description, you may again use “ConnectBooster." Once again Save the item to generate the new Public and Private keys. DO NOT Save & Close as the Private Key will disappear after the creation pop-up is closed.


Copy the keys to your clipboard, and document the public and private keys for your records. If they are lost, you may simply create a new set in the future.

Within the ConnectBooster Portal

Under Integrations --> select your ConnectWise integration card.


Enter the required credentials and save the changes. 

1. "Company Name" is usually a short, lowercase version of your business name. This can be located on your Manage login screen.

2. REST API Public Key

3. REST API Private Key

4. "Site" can be left at the default "api-na.myconnectwise.net" value for cloud Manage users. If you locally host your Manage instance, please enter your URL endpoint.

Use "Test Connection" to validate the connection is successful. Congratulations! Your setup is complete!

You may initiate a sync immediately, or simply wait for the next cycle within the hour.  Note: information requests from your ConnectWise Manage may occur on certain page loads and button clicks within the portal.


If the ConnectWise integration does NOT exist, please contact ConnectBooster Support for creating NEW integrations or CONVERTING current platforms.